Normally you can’t obtain bootable media of macOS. OS X was a different story, but also you had to pay for those versions. As an owner of a MacBook Pro, it’s slightly unsettling that I wouldn’t necessarily be able to plug in a bootable USB or insert a DVD with the macOS installer image in the event that I needed to re-install my OS because my SSD ate the dust, or something.
This guide will also be useful for those who can run Virtual Machines of macOS in environments like VirtualBox etc.
To abide with Apple’s terms of use, you must go through official channels to obtain the macOS installer. This means you actually need a Mac or a MacBook to create this bootable ISO.
Overview of how to create a bootable macOS 10.13 High Sierra ISO image:
- Download macOS from app store
- Open Terminal
- Run commands
- Rename to .ISO
Download
Click this link to open the macOS High Sierra download in the App Store
https://itunes.apple.com/us/app/macos-high-sierra/id1246284741?mt=12
Especially if you’ve already upgraded to high sierra and deleted the installer data (with CleanMyMac etc) you will need to download this again before proceeding with this article.
Run commands in Terminal
Run these commands one at a time (Update 2/6/2018 :: I changed the 5130m to 5200m based on feedback from the comments)
hdiutil create -o /tmp/HighSierra.cdr -size 5200m -layout SPUD -fs HFS+J
hdiutil attach /tmp/HighSierra.cdr.dmg -noverify -mountpoint /Volumes/install_build
sudo /Applications/Install\ macOS\ High\ Sierra.app/Contents/Resources/createinstallmedia --volume /Volumes/install_build
mv /tmp/HighSierra.cdr.dmg ~/Desktop/InstallSystem.dmg
hdiutil detach /Volumes/Install\ macOS\ High\ Sierra
hdiutil convert ~/Desktop/InstallSystem.dmg -format UDTO -o ~/Desktop/HighSierra.iso
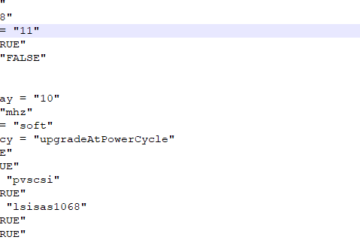
Here are some of my outputs for you to review (after the first three commands)


The resulting file on my desktop is almost ready to use.

Rename file
Rename the file, removing .cdr from the end. Confirm by clicking “Use .iso”

Done!

The resulting ISO can be used to create bootable USBs, DVDs, install VMs, or simply to archive for your backups “just in case”.
Cheers!


60 Comments
KRISHNA DEV ANAND · October 13, 2018 at 11:45 pm
Will 5200m size also work for ‘macOS Mojave 10.14’ ?
What bare minimum size I should use to create smallest possible ‘macOS Mojave 10.14.iso’ using following script method which is exacty similar to above method but looking more handy…
https://github.com/thelamehacker/macOS-toolkit/blob/master/toolkit/macOS_Mojave_ISOMaker.sh
Thanks & Regards…
Nathan Brown · January 7, 2019 at 6:23 pm
An additional 573.8 MB is needed when I tried using this for Mojave. so 5200 + ~580 would be needed.
unitelove · September 4, 2018 at 2:13 pm
does my usb drive have to be named “install_build” for it to work?
Mike · August 28, 2018 at 6:09 pm
FINALLY! I’ve been trying to a create an OSX VM with VirtualBox for a couple days now, and no other instructions provided for creating bootable OSX .iso’s were working – including the ones specifically on the VirtualBox website.
https://en.wikibooks.org/wiki/VirtualBox/Setting_up_a_Virtual_Machine/Mac_OS_X
I ran across yours and it worked!
Thanks much!! 🙂
Afaq · August 28, 2018 at 3:57 am
How much is the size of the iso file?
Bruce Xie · August 18, 2018 at 3:45 am
I’ve converted Install macOS High Sierra.app to HighSierra.iso, but how can I install this iso in my parallel desktop? when I selected this iso file, it prompt “unable to detect operating system”.
Automation Dello · August 13, 2018 at 4:06 pm
Hi Tyler. I successfully created the iso. Thank you for the concise steps. I ran into an issue when I tried to create High Sierra VM on Virtual Box on a High Sierra host. Under MacOS Utilities , when I selected ‘Install MacOS’, instead of installing the OS, it booted back to the same window asking me to Install macOS. Any thoughts?
Arnaldo Montoya · July 25, 2018 at 11:24 pm
Just for the record: this fails if you try to build on Mavericks. I used these instructions here: https://www.technobuzz.net/create-bootable-mavericks-os-x-iso-step-step-guide/ replacing the BaseSystem.dmg with the one inside the app at Contents/SharedSupport/BaseSystem.dmg.
Allen · July 2, 2018 at 11:44 am
Having problems installing on win7. How do I post a screen shot of the issue?
Aidan · June 26, 2018 at 12:01 pm
I was trying to do this guide for MacOS Mojave Beta. I kept getting the error /Volumes/install_build is not large enough for install media. An additional 229.1 MB is needed.
I would get this error after step 3. As it turns out, Mojave Beta is 230 MB bigger than High Sierra. So I did the same instructions, but edited step 1 and changed 5200m to 5500m. Anyone doing this method for Mojave should do the same.
Tyler Woods · June 26, 2018 at 12:10 pm
Thank you for your input regarding macOS 10.14 Mojave! I’m happy the guide helped you.
Aidan · June 27, 2018 at 1:24 pm
But I am trying to use the ISO file I created to launch a virtual machine (10.13 Host, 10.14 guest). I use the Mojave.iso as the boot file, and I get this screen: “UEFI interactive shell” etc. etc. ending with “Press ESC in 0 seconds to skip startup.nsh or any other key to continue. Then it gives me the following prompt:
Shell>
I also got this error when creating the ISO file on step 3:
sudo /Applications/Install\ macOS\ Mojave\ Beta.app/Contents/Resources/createinstallmedia –volume /Volumes/install_build
Password:
Ready to start.
To continue we need to erase the volume at /Volumes/install_build.
If you wish to continue type (Y) then press return: y
Erasing disk: 0%… 10%… 20%… 30%… 100%
Copying to disk: 0%… 10%… 20%… 30%… 40%… 50%… 60%… 70%… 80%… 90%…
Error: Error Domain=NSCocoaErrorDomain Code=512 ““InstallESD.dmg” couldn’t be copied to “SharedSupport”.” UserInfo={NSSourceFilePathErrorKey=/Applications/Install macOS Mojave Beta.app/Contents/SharedSupport/InstallESD.dmg, NSUserStringVariant=(
Copy
), NSDestinationFilePath=/Volumes/Install macOS Mojave Beta 1/Install macOS Mojave Beta.app/Contents/SharedSupport/InstallESD.dmg, NSFilePath=/Applications/Install macOS Mojave Beta.app/Contents/SharedSupport/InstallESD.dmg, NSUnderlyingError=0x7f99aef7eaf0 {Error Domain=NSPOSIXErrorDomain Code=34 “Result too large”}}The copy of the installer app failed.
I really don’t know whats going on. This error doesn’t make sense to me.
Richard Watt · July 5, 2018 at 1:11 pm
Try increasing the output size of the *.cdr file to 6g or higher.
hdiutil create -o /tmp/MojaveBeta.cdr -size 6g -layout SPUD -fs HFS+Jmarkh · June 18, 2018 at 4:07 pm
Why HFS+J instead of APFS?
Tyler Woods · June 19, 2018 at 10:34 am
I am under the impression that booting to APFS install-media will result in an APFS formatted file system, which is still very new.
You can always opt to convert your file system after installation.
Simon · April 6, 2018 at 2:20 pm
All the steps above worked, except I get an error: The Finder can’t complete the operation because some data in “HighSierra” can’t be read or written. (Error code -36), and because it’s an ISO, the dot_clean method doesn’t appear to be working. Any thoughts?
Ritika Nayyar · April 5, 2018 at 6:02 am
Hi Tyler,
I am trying to do the same thing for MAC OS X 10.6 but I don’t see createinstall file under that path \Install Mac OS X.app\Contents\Resources.
Can you help to make a bootable ISO for Mac OS X Snow Leopard 10.6 to get installed on Vmware ESXi 6.5.
Thanks
Daniel Pedrosa Morillo · March 2, 2018 at 2:26 pm
I can confirm that this method also works for creating a bootable ISO of El Capitan. I’ve used the resulting ISO to create a VM in Virtualbox successfully.
However, in the third step I added an additional command, just in case:
sudo /Applications/Install\ OS\ X\ El\ Capitan.app/Contents/Resources/createinstallmedia –volume /Volumes/install_build –applicationpath /Applications/Install\ OS\ X\ El\ Capitan.app
Regards.
Seevideoz · February 17, 2018 at 1:21 pm
thank you this is what i’m looking for THANKss
Kai · February 5, 2018 at 8:36 am
that did work quite well – all problems encountered are already solved in the comments:
– you need to change size 5130m to 5200m
– you have to mount the dmg and unmount it before it can be converted into ISO
Thanks tyler!
this can be used to create an USB stick from the high-sierra ISO (first good google hit): https://blog.tinned-software.net/create-bootable-usb-stick-from-iso-in-mac-os-x/
equalityath · January 23, 2018 at 2:34 am
hi,
sudo /Applications/Install\ macOS\ High\ Sierra.app/Contents/Resources/createinstallmedia –volume /Volumes/install_build
Returns error command not found
Is there any other command?
Thanks
vikas choudhary · February 1, 2018 at 9:09 am
I am getting same error please suggest me
pedoseal · February 10, 2018 at 4:37 am
Might be related to this issue:
http://osxdaily.com/2017/09/27/download-complete-macos-high-sierra-installer/
Adam · January 12, 2018 at 10:23 am
I successfully created the OS X HS ISO but when I went to install it in the VM it gives me 4 options
1 restore from time machine
2 install mac OS
3 get help online
4 disk utility
I have chosen each, and when I choose #2 it walks me through but then when it asks where I should install the OS there is not an option to choose.
Does anyone have any advice?
Tyler Woods · January 12, 2018 at 1:55 pm
I would use disk utility to ensure you have a volume formatted with macOS extended journaled filesystem
Please exercise caution not to overwrite or format disks by mistake (:
TC · April 13, 2018 at 6:47 am
Erase your Virtual Drive through Disk Utility first.
SirGarmaples · December 17, 2017 at 4:22 am
“command not found” after running the 3rd command. What to do?
jejunomad1 · January 2, 2018 at 12:33 pm
The following command worked for me :
sudo /Applications/Install\ macOS\ Sierra.app/Contents/Resources/createinstallmedia –volume /Volumes/install_build –applicationpath /Applications/Install\ macOS\ Sierra.app –nointeraction
jejunomad1 · January 2, 2018 at 12:40 pm
Oops! Sorry. I misunderstood the question. Please ignore my reply.
Carminus · January 3, 2018 at 1:43 pm
had to use cp instead of mv in ” cp /tmp/HighSierra.cdr.dmg ~/Desktop/InstallSystem.dmg” mv would not copy to desktop.
I hate mac os. Only doing this because of work. So tempted to tell the techs to reimage the mac book pro to windows 10.
Bernard · November 24, 2017 at 1:02 pm
Merci beaucoup Tyler, however at the last but one step (hdiutil detach) I got an error saying that disk3, i.e. “Install macOS High Sierra” is busy and cannot be unmounted.
Have I done something wrong ?
mac-pro-de-bernard-2:~ bernardbaz$ hdiutil create -o /tmp/HighSierra.cdr -size 5200m -layout SPUD -fs HFS+J
…………………………………………………………………………………..
created: /tmp/HighSierra.cdr.dmg
mac-pro-de-bernard-2:~ bernardbaz$ hdiutil attach /tmp/HighSierra.cdr.dmg -noverify -mountpoint /Volumes/install_build
/dev/disk3 Apple_partition_scheme
/dev/disk3s1 Apple_partition_map
/dev/disk3s2 Apple_HFS /Volumes/install_build
mac-pro-de-bernard-2:~ bernardbaz$ sudo /Applications/Install\ macOS\ High\ Sierra.app/Contents/Resources/createinstallmedia –volume /Volumes/install_build
Password:
Ready to start.
To continue we need to erase the volume at /Volumes/install_build.
If you wish to continue type (Y) then press return: Y
Erasing Disk: 0%… 10%… 20%… 30%…100%…
Copying installer files to disk…
Copy complete.
Making disk bootable…
Copying boot files…
Copy complete.
Done.
mac-pro-de-bernard-2:~ bernardbaz$ mv /tmp/HighSierra.cdr.dmg ~/Desktop/InstallSystem.dmg
mac-pro-de-bernard-2:~ bernardbaz$ hdiutil detach /Volumes/Install\ macOS\ High\ Sierra
hdiutil: couldn’t unmount “disk3” – Resource busy
mac-pro-de-bernard-2:~ bernardbaz$
StupidWiseGuy · January 1, 2018 at 5:55 am
rebooting fixed this problem for me
prettycode2015 · November 15, 2017 at 9:07 pm
I have created the iso per this post instructions and attached it to a Virtualbox 5.1.30 configured for macOS 10.13 High Sierra (64-bit) with 128MB video memory and ICH9 chipset, on a macOS High Sierra host.
Upon booting from CD I get a Mapping Table with 8 Alias(s) lines and then the Shell prompt. Where do I go from there to install the macOS?
Tyler Woods · November 16, 2017 at 11:30 am
You’re probably forgetting a step which isn’t the most clear. I don’t offer support on this directly until I write some sort of a guide, however there are commands that are necessary to run to prepare your macOS VM in the windows command prompt:
cd "C:\Program Files\Oracle\VirtualBox\"VBoxManage.exe modifyvm "Your VM Name" --cpuidset 00000001 000106e5 00100800 0098e3fd bfebfbff
VBoxManage setextradata "Your VM Name" "VBoxInternalDevicesefi0Config DmiSystemProduct" "iMac11,3"
VBoxManage setextradata "Your VM Name" "VBoxInternalDevicesefi/0Confi gDmiSystemVersion" "1.0"
VBoxManage setextradata "Your VM Name" "VBoxInternalDevicesefi/0Confi gDmiBoardProduct" "Iloveapple"
VBoxManage setextradata "Your VM Name" "VBoxInternalDevicessmc/0Confi gDeviceKey" " ourhardworkbythesewordsguarded pleasedontsteal(c) AppleComputerInc"
VBoxManage setextradata "Your VM Name" "VBoxInternalDevicessmc/0Confi g/GetKeyFromRealSMC" 1
prettycode2015 · November 16, 2017 at 4:53 pm
Tyler, thank you for your timely response. I am using a macOS host, not a Windows host. Are there any additional preparations to do on the hosting Mac? the host has macOS High Sierra.
prettycode2015 · November 16, 2017 at 5:17 pm
Got it to work! It was me. I’ve missed the “kernelcashe” error on boot files copying step. I’ve changed the size to 5200m as you’ve indicated below and voila. Thank you for the excellent guide and top notch response time.
Andy Nicholson (@andrewdotnich) · May 7, 2018 at 5:25 pm
@prettycode2015 can you fill me in on this piece? I keep getting the guru meditation and I’m sure I’ve followed all the steps correctly :/
MyNamesJeff · February 10, 2018 at 6:36 am
is there any extra steps for vmware player 12?
Aaron S · December 26, 2017 at 8:07 pm
I am using this in a VirtualBox in ubuntu. What(if any) commands do I need to run for this to work?
Thank you so much for this guide!
TonyJ · November 9, 2017 at 4:48 pm
I ran into the following error on the final command:
hdiutil: convert failed – Resource temporarily unavailable
To fix, I double clicked the InstallSystem.dmg on my desktop to remount it (apparently something got stuck in the detach process), then used Finder to eject it. Proceeded without further errors.
Thanks for the quick step-by-step!
Robin · November 2, 2017 at 12:30 pm
Unfortunately mine failed with:
Copying boot files…
Failed to copy kernelcache, “prelinkedkernel” couldn’t be copied to “.IABootFiles”.
Done.
Tom · November 2, 2017 at 6:12 pm
Same here … “Failed to copy kernelcache, „prelinkedkernel“ konnte nicht nach „.IABootFiles“ kopiert werden.
How can we fix this?
mtech · November 3, 2017 at 9:29 pm
Space issue. Change 5130m to 5200m.
Tyler Woods · November 3, 2017 at 9:32 pm
Thank you for your response! Indeed, with updates, the installer will not fit in a 5130m image. Keeping it slim, 5200m is appropriate. Some people jump all the way to 7xxxm but that’s just to be safe for all versions…
Justin Bacle · November 24, 2017 at 5:08 pm
Thank you so much 🙂
Jim Leask · January 16, 2018 at 11:17 am
I needed this size change too. Worked really well otherwise. Any chance of updating the original script to the new values that seem to be required. Thanks for the post though. Every release this process seems to change a bit.
Jim P. · November 1, 2017 at 5:13 pm
How did you get the number 5130m? Is there a script to determine the minimum number required?
Interested to know because of 10.13.x updates
Tyler Woods · November 1, 2017 at 6:07 pm
That parameter is to define the size of the image file being created, so as long as it is sufficient to hold the installer then you will be ok.
Jim P. · November 1, 2017 at 8:17 pm
Is there a way to trim the size down?
Bernhard · February 2, 2018 at 3:28 pm
Latest version (2018-02-02: 10.13.3) needs a little more space – I used 5200m, resulting in 51M free space on the disk image.
msingh783 · October 29, 2017 at 6:55 am
You can download Mac OS X High Sierra ISO directly from below link:
http://www.downloadfreeios.com/2017/10/download-macos-high-sierra-iso-dmg-full.html
It worked for me..
EdG · March 19, 2018 at 2:49 pm
Please note: the big downside of such links is — you have no idea what you are getting their. You are downloading an ISO, so a person who wants to spy to you … only needs to give you an ISO that contains a virus.
So, yes, downloading such a “ready to go ISO” is convenient – it always carries the risk of running COMPROMISED code.
suzanne · October 15, 2017 at 4:25 pm
Ran perfectly using your terminal commands- So cool-thanks so much!
Suzanne
Tyler Woods · October 17, 2017 at 2:28 pm
I’m happy it worked out for you, thank you Suzanne!
Shaggy Fuentez · October 10, 2017 at 10:13 pm
Download macOS 10.13 High Sierra bootable ISO
https://thepiratebay.org//torrent/18716045/macOS%2010.13%20High%20Sierra%20Bootable%20ISO
Mar · November 5, 2017 at 9:17 pm
I would like to know if the macOS 10.13 High Sierra torrent from thepiratebay is the latest High Sierra 10.13.1 released on Oct. 31?
Tyler Woods · November 5, 2017 at 9:18 pm
It does not appear to be the latest update.
Mac把Install macOS High Sierra.app转换成iso – Bruce's Blog · September 6, 2018 at 9:00 pm
[…] 参考:How to create a Bootable ISO image of macOS 10.13 High Sierra installer […]
Installing High Sierra 10.13.6 in VirtualBox 5.2.12 on Linux x86_64 | Astr0baby's not so random thoughts _____ rand() % 100; · July 15, 2018 at 5:12 am
[…] I have followed this blog post to create the ISO for High Sierra 10.13.6 https://tylermade.net/2017/10/05/how-to-create-a-bootable-iso-image-of-macos-10-13-high-sierra-insta… […]
Virtual Machine to Run Mojave and How I'm an Idiot - Podfeet Podcasts · July 7, 2018 at 8:45 am
[…] that downloads from the Mac App Store for Mojave and turns it into an ISO. The instructions are at tylermade.net/… Technically they’re for High Sierra but I cracked the code on how to replace High Sierra with […]